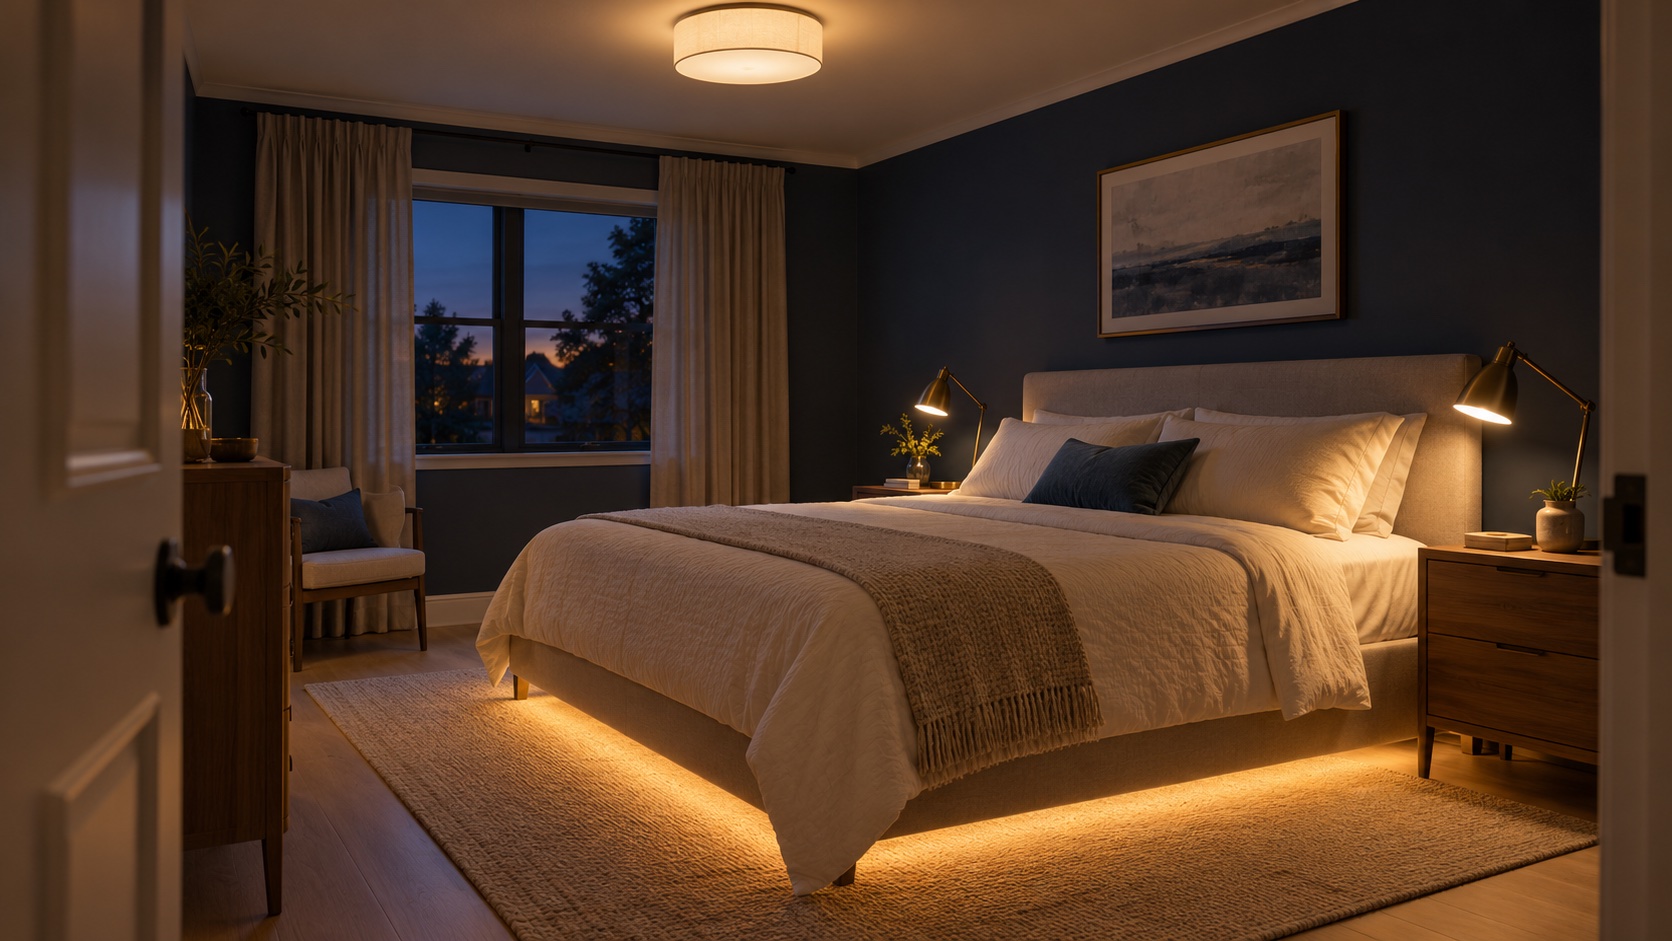
Give your bedroom separate controls for moving around, reading and settling down. You should be able to put a book down and turn the room light off without getting out of bed. I’d start with where you read and how you reach the door, then choose the fittings.
Put the light where your evening happens
Draw the bed, bedside tables, wardrobe, door and available outlets before marking lights. Then give each light a job. The Australian Government’s YourHome lighting guidance separates general room light from local task and accent lighting; use that distinction to avoid making one bright fitting carry the whole bedroom.
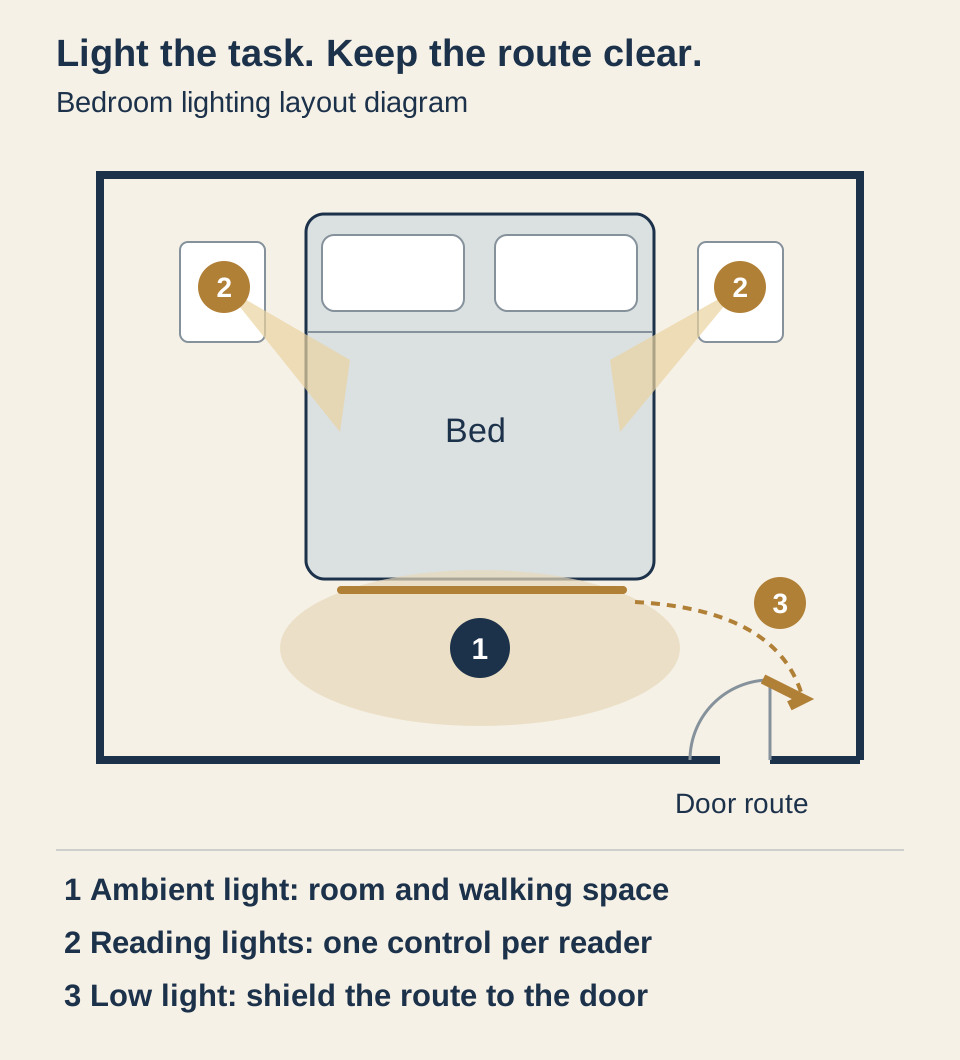
Use this diagram as a placement plan, then adapt it to your own bed, doorway and outlets:
- Ambient light: place a diffused ceiling fitting or a room-lighting lamp where it can light the walking space and help you find clothes. Keep its control separate from the reading lamps.
- Reading light: give each reader a shaded or adjustable lamp beside the bed. Aim it at the page from the side; keep the light source out of both readers’ direct view. Sit in your normal reading position before fixing the lamp’s final location.
- Low evening and night light: place a concealed or shielded light where it reveals the route to the door without shining across the pillows. Keep the floor and cables clear. Choose a dimmable or suitably low-output product and check the result from lying height.
You do not need every layer running at once. A room light helps with dressing and tidying; a reading lamp puts light on the book; a low route light serves a different moment. Use the layered-lighting guide if you need the general terms.
Work out a light budget without treating it as a guarantee
Measure the room, then separate its open walking area from the page you read and the clothes you need to see. Lumens describe output; illuminance describes what arrives on a surface. NIST’s SI definitions set out the lumen and lux units. A lamp rating alone does not show the distribution across your bed or floor.
For a first calculation, try the following example inputs, chosen for this guide on October 26, 2026:
- Rectangular room area in square feet.
- An illustrative ambient target of 10–15 footcandles.
- An illustrative light-loss factor of 0.8.
These inputs demonstrate a planning range, not a bedroom standard or a measured property of your room. Use the room lumens calculator with its matching feet-and-footcandles inputs:
Estimated lamp lumens = length × width × target footcandles ÷ light-loss factor.
| Example bedroom | At 10 fc and a 0.8 factor | At 15 fc and a 0.8 factor |
|---|---|---|
| 10 × 10 ft | 1,250 lm | 1,875 lm |
| 12 × 14 ft | 2,100 lm | 3,150 lm |
| 14 × 16 ft | 2,800 lm | 4,200 lm |
Each row is arithmetic from the stated assumptions. Treat it as a way to compare possible room-light outputs, not an instruction to buy that total in one ceiling fitting. The shortcut does not model the share of light that actually reaches a particular surface, nor beam overlap, glare, wall reflectance or furniture shadows. Dark surfaces and an awkward layout need closer review, rather than an invented universal multiplier.
Keep bedside reading separate. Aim the reading lamp at the page, check whether you can read comfortably, then reduce spill toward the other pillow. If you need greater visual assistance, get advice on the actual task and your needs instead of simply raising the whole room’s brightness. Try the bedroom lumens quiz for a separate exercise about the assumptions behind light budgets; use the lux guide for surface illumination.
Choose fittings you can live with from the bed
Ceiling light: make it useful, then dim it
Look for a diffused room-light source with controllable output. Check the view from the pillows as well as from the door: an attractive fitting can still leave its brightest surface in your eyes. Before choosing a shade, consider how much light it sends into the room and whether the lamp can be replaced.
Recessed lights: place them around the task
Do not mark a tidy grid first and hope the bed fits underneath. Check where the beams fall and what you see when lying down. Use them where their distribution serves a clear purpose, such as lighting the wardrobe area, rather than placing a bright source directly over each pillow. YourHome explains why directional downlights can make bright pools while leaving other surfaces dark. Read the recessed-lighting guide for the fixture details.
Bedside lamps: check the page and the other person
Try the lamp with your head on the pillow and again sitting up with a book. Move or aim it until the page is useful and the bulb is shielded. Put its switch within an easy reach. For two readers, give each person independent control rather than forcing both lamps on together. Use the glare guide when the room has plenty of light but still feels uncomfortable.
Light strips: hide the source and plan access
Use a concealed strip for a low background glow or route light, not as the only reading light. Check for reflected dots on a shiny floor, direct views of the strip from bed, and access to its power supply. Follow the product’s mounting and ventilation instructions. Keep cables out of the walking route and avoid trapping the supply under bedding.
Colour and rendering: choose for this room’s jobs
For a warm bedroom starting point, compare 2700 K lamps. The governments’ Energy Rating guide identifies that warm-white appearance as suitable for bedrooms. YourHome classifies 2700–3200 K as a warm-white range for household rooms. Those are colour descriptions, not a promise about sleep.
Match the two bedside lights if they are used together. Give a dressing or makeup area its own consideration instead of forcing one colour setting on every task in the home. Keep a bedtime setting low and comfortable; a warmer bulb at excessive brightness is still a bright bulb.
If judging clothing colours matters, compare lamps with published colour-rendering information. Energy Rating describes CRI 90 or above as useful where task colour accuracy matters. CRI concerns colour rendition, not dimming quality or a sleep benefit. Check the actual garments under the proposed light before deciding.
Put the controls within reach
Plan to switch the main room light from the entrance and from bed. Ask an electrician about the correct multi-location control arrangement for your wiring; do not assume two ordinary dimmers can be placed on the same circuit. Leave each reading light independently operable. An app can be convenient, but check how you will turn the lights off when your phone is elsewhere.
For dimming, note the exact lamp or fixture, driver and control model. Check their compatibility information and the LED load limits, not just the large incandescent rating printed on an older control. Feit Electric’s compatibility guidance explains why an unsuitable combination may flicker, buzz or drop out at low settings. In a bedroom, check the lowest stable setting and whether the lamp starts reliably there; for broader fault-finding, use the LED flicker guide.
Before any circuit work or dimmer replacement, turn off power at the circuit breaker and have the circuit verified dead. A wall switch being off is not safe isolation. If you cannot identify and safely isolate the circuit, do not open the fitting or control: use a qualified electrician. Follow the exact product instructions and local requirements. Leviton’s dimmer guidance calls for breaker isolation and checking that power is off, and directs anyone unsure about wiring to an electrician. This layout guide does not provide wiring steps.
Catch the mistakes before fixing positions
| If your plan does this | Change it this way |
|---|---|
| Uses one ceiling light for everything | Add a separate reading light and a low evening setting. |
| Puts an exposed bulb in the view from the pillow | Shade, reposition or re-aim it; check from both sides of the bed. |
| Makes the whole room brighter for one reader | Move useful light onto the page and limit spill toward the other pillow. |
| Uses one fixed colour and brightness for every activity | Separate bedside, room and dressing controls; compare them in use. |
| Leaves the only switch at the door | Plan an accessible bedside control before committing to the wiring. |
| Runs a bright strip along the night route | Shield it and choose a lower usable output; keep the route clear. |
Before ordering, sit where you will read, lie where you will sleep and walk the route to the door. Mark what each light must do and where its control belongs. Take that plan, the fixture details and your calculation assumptions to the installer.
Questions & discussion
Share a question or a useful experience about this guide. Comments appear immediately. Your name and comment are public. Email is optional and stays private; reply emails are not enabled yet. Comment privacy.