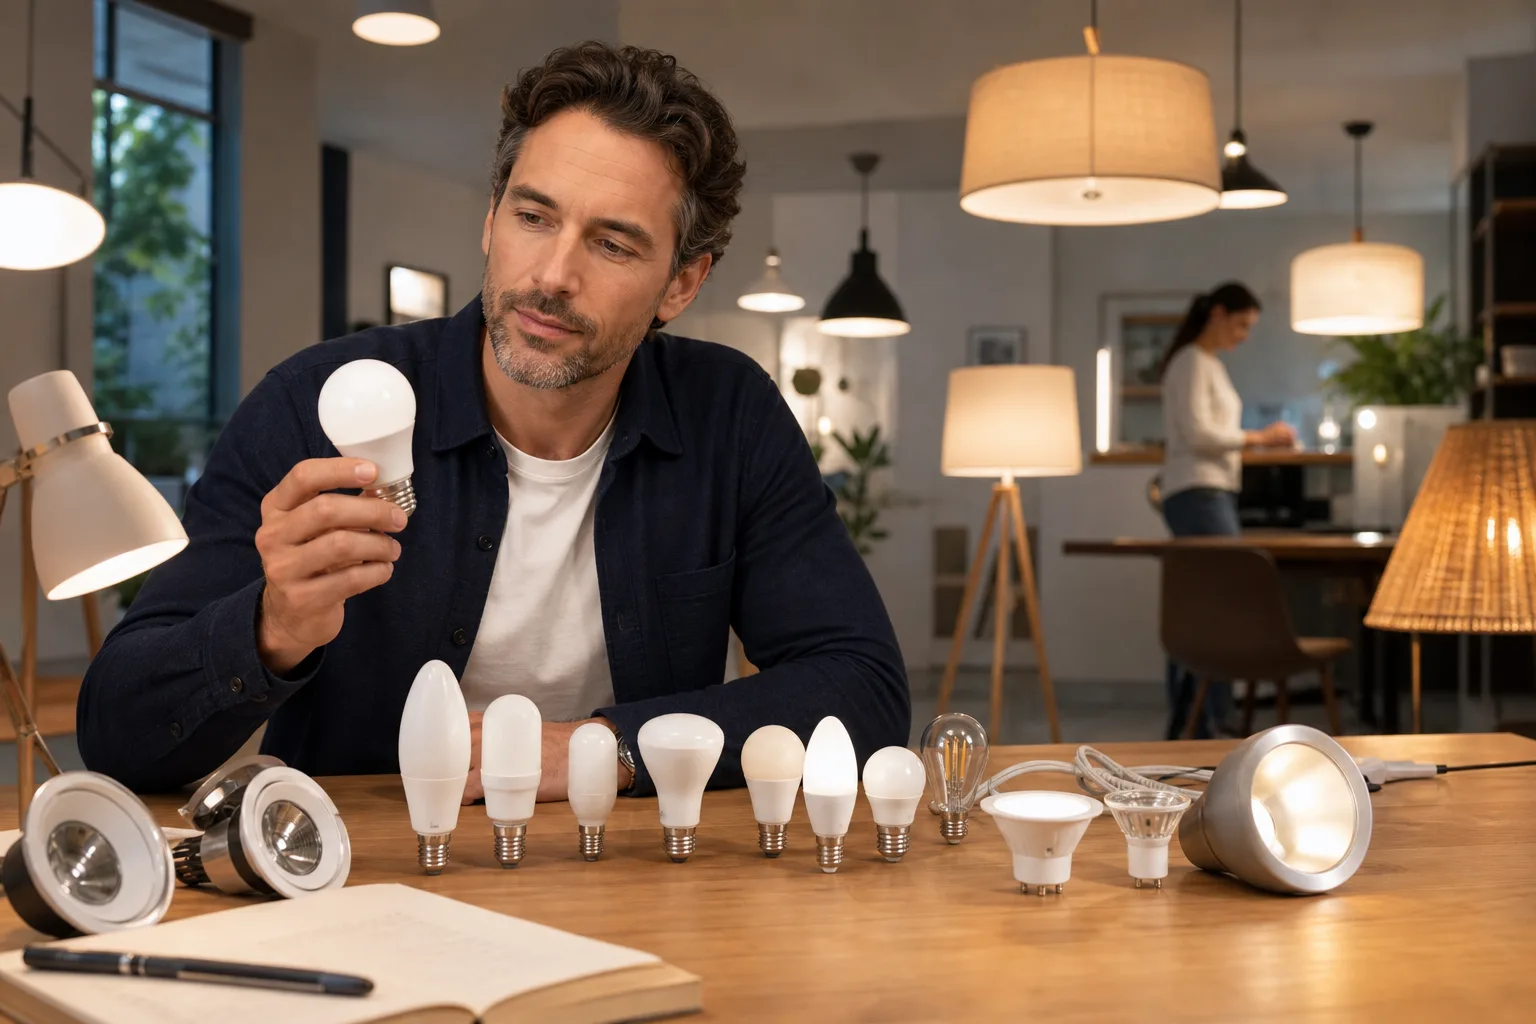
To understand how to choose an LED bulb, start with the fixture rather than the wattage printed on the old bulb. Match the base and physical shape, choose the required brightness in lumens, select a suitable color temperature and color-rendering quality, and then confirm that the bulb is approved for the fixture, location and controls. That sequence prevents most problems with poor light, bad fit, flicker and premature failure.
The quick way to choose an LED bulb
For a straightforward replacement, remove the old bulb only after switching it off and allowing it to cool. Record its base, shape and any identifying codes, then check the fixture label for its maximum lamp wattage and other restrictions. If the old light level was comfortable, use its stated lumen output or incandescent-equivalent rating as a starting point.
Check these seven items on the package
- Base: It must match the socket, such as a common medium screw base or a smaller candelabra base.
- Shape and dimensions: Confirm that the bulb will fit beneath shades, covers and retaining rings.
- Lumens: This is the bulb’s total light output.
- Watts: This is the electrical power it uses, not its brightness.
- Color temperature: The Kelvin value describes whether the white light looks warmer or cooler.
- Color quality: CRI provides a basic indication of how naturally colors may appear.
- Application ratings: Look for dimmer compatibility and any enclosed-fixture, damp-location, wet-location or low-voltage requirements.
The U.S. Department of Energy recommends comparing bulbs by lumens and then considering wattage: lumens describe light output, while watts describe power input. Its replacement guide associates approximately 450, 800, 1,100 and 1,600 lumens with traditional 40, 60, 75 and 100-watt incandescent bulbs respectively. These are comparison points, not guarantees of identical light distribution in every fixture. See the Department of Energy buying guidance. ([energy.gov](https://www.energy.gov/cmei/femp/purchasing-energy-efficient-light-bulbs?utm_source=openai))
| Old incandescent reference | Starting LED brightness | What to verify next |
|---|---|---|
| 40-watt equivalent | About 450 lumens | Enough for a small accent or low-output lamp? |
| 60-watt equivalent | About 800 lumens | Suitable shade clearance and light distribution? |
| 75-watt equivalent | About 1,100 lumens | Glare controlled by the fixture or shade? |
| 100-watt equivalent | About 1,600 lumens | Actual wattage below the fixture maximum? |
For more detail, compare lumens with watts versus lumens. If you only know the wattage of another lamp type, treat any conversion as an estimate because efficiency and beam distribution vary.
Choose brightness for the room and task
Replacement and room planning are different jobs
Replacing one satisfactory bulb is mainly a lumen-matching exercise. Planning an entire room requires more thought because a bulb’s total lumens do not tell you how much light reaches a desk, countertop or floor. Shades, reflectors, beam angle, mounting height, wall colors and fixture position all affect the result.
A useful planning relationship is:
Lumens arriving at a surface ≈ illuminance × area.
Using U.S. customary units, lumens arriving at the working plane are approximately foot-candles multiplied by square feet. In metric units, they are lux multiplied by square meters. Installed bulb lumens must normally be higher because not all emitted light reaches the target surface.
For example, suppose you select an illustrative ambient target of 15 foot-candles for a 120-square-foot room. The calculation is 15 × 120 = 1,800 lumens reaching the plane. If you assume that 60% of the source light reaches that plane, the rough source requirement is 1,800 ÷ 0.60 = 3,000 lumens. The 60% factor is only a planning assumption; an actual result depends heavily on the room and fixtures. Use the lumens calculator or read the guides to foot-candles and lux before making a room-wide estimate.
Use layered lighting instead of one very bright bulb
A comfortable room usually benefits from more than one light source. Layered lighting combines:
- Ambient light for general movement and orientation.
- Task light positioned near reading, cooking, grooming or desk work.
- Accent light for artwork, shelves, plants or architectural details.
Layering can reduce the pressure on a central fixture to do everything. A lower-output ambient bulb may be comfortable when a focused desk or reading lamp supplies the task light. For a complete layout, see how to plan home lighting and the room-specific guidance for a living room or home office.
Select color temperature and color quality
Kelvin describes appearance, not heat or brightness
Correlated color temperature, or CCT, describes the appearance of white light. Lower Kelvin values look warmer or more yellow, while higher values look cooler or more blue-white. ENERGY STAR guidance groups approximately 2200–3000K with warmer incandescent-like light, 3500–4100K with whiter light and 5000–6500K with a cooler, bluer appearance. Review ENERGY STAR’s color and downlight guidance. ([energystar.gov](https://www.energystar.gov/products/light_fixtures?utm_source=openai))
- 2700K: A conventional warm residential appearance.
- 3000K: Warm-white but slightly crisper than 2700K.
- 3500K: A neutral transition between warm and cool.
- 4000K: A cooler white often chosen where visual clarity is emphasized.
- 5000K and above: A distinctly cool appearance that can feel stark in some interiors.
These are appearance descriptions rather than fixed room rules. Existing daylight, paint, timber, textiles and adjacent lamps can change how a CCT feels. Keep visible bulbs in the same area at the same nominal CCT unless a deliberate contrast is part of the plan. A selectable-CCT bulb can help when you are uncertain, provided its switch remains accessible. Ross’s color temperature picker offers another way to narrow the choice.
Use CRI as a screening tool
The Color Rendering Index is a 0–100 scale that compares aspects of color appearance under a light source with a reference source of similar color temperature. Current ENERGY STAR downlight criteria require a general CRI value of at least 80 and an R9 value above zero. CRI does not describe brightness, efficiency or every aspect of color quality, so it should not be used alone. ([energystar.gov](https://www.energystar.gov/products/light_fixtures/downlights-key-product-criteria?utm_source=openai))
An 80-plus CRI bulb can be adequate for ordinary circulation and utility lighting. Consider 90-plus CRI where food, skin tones, clothing, artwork or interior finishes matter, while remembering that two bulbs with the same CRI can still render individual colors differently. Learn more in the CRI guide.
Match the bulb to the fixture
Base, shape and beam must all fit
Do not assume that a bulb is compatible merely because it screws into the socket. Check its diameter, overall length and neck shape. An LED driver makes some bulbs wider near the base than the incandescent bulb they replace, which may cause interference with a shade or recessed trim.
- General-service bulbs: Common in table lamps, floor lamps and open ceiling fixtures.
- Globe and candle bulbs: Intended mainly for fixtures where the lamp is visible or space is restricted.
- Reflector and PAR-style bulbs: Send more light in a particular direction and are commonly used in recessed, track or outdoor fixtures.
- Low-voltage lamps: Must be compatible with the fixture’s transformer or driver as well as its socket.
Beam angle matters when the bulb is directional. A narrow beam concentrates light over a smaller area; a wide beam spreads it more broadly. Total lumens can therefore be misleading when comparing a directional spotlight with a general-service bulb. Use the beam-angle guide or beam-spread tool for accent and task applications.
Read every application restriction
Heat can build up around an LED bulb even though it uses less power than an incandescent equivalent. For a fixture with a complete cover or sealed enclosure, choose a bulb explicitly marked as suitable for enclosed fixtures. UL Solutions notes that self-ballasted LED lamps are generally intended for dry indoor locations unless they carry additional damp- or wet-location markings, and product markings may impose enclosure or orientation restrictions. Read the UL Solutions application overview. ([code-authorities.ul.com](https://code-authorities.ul.com/about/blog/led-retrofit-kits/?utm_source=openai))
Also check for special requirements in recessed housings, ceiling fans, outdoor fixtures, range hoods and low-voltage systems. Appliance lamps and emergency equipment should use only the lamp type specified by their manufacturer. If a fixture label is missing, unreadable or contradictory, obtain the manufacturer’s documentation or ask a licensed electrician rather than guessing.
Check dimmers, smart controls and electrical safety
Dimmable must mean compatible
A bulb marked “dimmable” is not automatically compatible with every dimmer. ENERGY STAR advises checking the bulb or downlight manufacturer’s compatibility information because unsuitable combinations can produce flicker, buzzing, a limited dimming range, delayed starting or failure to switch off cleanly. ([energystar.gov](https://www.energystar.gov/products/light_fixtures?utm_source=openai))
Confirm three things: the bulb is dimmable, the control is designed for LED loads, and the exact lamp-and-control combination is supported where a compatibility list is available. A multi-bulb fixture also has a combined load. If a new wall dimmer needs wiring, use a licensed electrician unless you are legally permitted, competent and equipped to perform that work safely.
Smart bulbs need constant power
Most app-controlled bulbs need the wall switch left on so their electronics remain available to receive commands. Do not place a smart bulb on a conventional wall dimmer unless both manufacturers explicitly permit that arrangement. For a wall-controlled experience, a compatible smart switch with ordinary dimmable LEDs may be more practical, but neutral-wire, load and network requirements vary.
Make the replacement safely
- Switch the light off and let the old bulb cool completely.
- Use a stable platform appropriate for the working height; do not balance on furniture.
- Keep hands dry and stop if the socket is loose, cracked, scorched or corroded.
- Never exceed the fixture’s stated maximum actual wattage. An “equivalent wattage” on LED packaging is only a brightness comparison.
- Do not modify sockets, bypass ballasts or alter fixture wiring as part of an ordinary bulb replacement.
Call a licensed electrician for damaged wiring, repeated breaker trips, visible arcing, burning odors, persistent overheating, a loose or blackened socket, or any hardwired repair. A lamp that flickers in multiple known-good fixtures may be defective; a fixture that flickers with multiple compatible lamps may indicate a control, socket or wiring problem.
Final buying checklist and troubleshooting
Before buying
- Photograph the old bulb and fixture label.
- Match the base, voltage, shape and physical dimensions.
- Choose lumens according to the old bulb or a room-lighting calculation.
- Select one CCT for lamps that will be seen together.
- Choose CRI according to how important color appearance is in that location.
- Check beam angle for recessed, track and accent lighting.
- Verify enclosed, damp, wet, fan, appliance or low-voltage suitability as applicable.
- Confirm dimmer, sensor, timer or smart-control compatibility.
- Retain the package and receipt until performance has been checked.
If the new LED does not work properly
| Symptom | Likely checks | Next step |
|---|---|---|
| Too dim | Lumens, shade losses, beam direction, dimmer setting | Use more lumens or add task lighting without exceeding fixture limits. |
| Harsh or glaring | Exposed bulb, excessive lumens, narrow beam, cool CCT | Use a diffusing fixture, wider beam or lower output. |
| Flickers or buzzes | Dimmer compatibility, loose seating, failing bulb | Test only in a safe compatible fixture; consult an electrician if the problem follows the circuit. |
| Fails early | Enclosed-fixture rating, heat, voltage or control incompatibility | Check application markings and stop using any damaged or overheating fixture. |
| Wrong color | Kelvin value or mismatch with adjacent lamps | Replace visible lamps with matching nominal CCT products. |
The best LED bulb is not simply the most efficient option on the shelf. It is the product that delivers the right amount and distribution of light while matching the socket, fixture environment and controls. If a basic replacement does not solve the problem, visit Ross’s fixture guides, lighting troubleshooting section or planning tools before changing electrical components.
Frequently asked questions
What LED bulb replaces a 60-watt incandescent bulb?
Start with an LED producing about 800 lumens. Check the LED’s actual wattage, physical dimensions, base, color temperature and fixture ratings rather than relying only on the 60-watt-equivalent wording.
Is 2700K or 3000K better for a home?
Neither is universally better. A 2700K bulb gives a conventional warm appearance, while 3000K looks slightly crisper but remains warm-white. Compare the choice with the room’s finishes, daylight and neighboring lamps.
Can any LED bulb be used in an enclosed fixture?
No. Use a bulb specifically marked as suitable for enclosed fixtures. Enclosures retain heat, and a bulb not designed for that environment may perform poorly or fail prematurely.
Why does an LED bulb flicker on a dimmer?
Common causes include an incompatible bulb-and-dimmer combination, a dimmer not designed for LED loads, a setting below the bulb’s stable range or a defective component. Persistent circuit-wide flicker, arcing or overheating requires a licensed electrician.
Questions & discussion
Share a question or a useful experience about this guide. Comments appear immediately. Your name and comment are public. Email is optional and stays private; reply emails are not enabled yet. Comment privacy.